Overview
CU Boulder and members of the Canvas community have begun to develop enhancements designed to expand existing Canvas functionality.
These enhancements fall into two categories: those that are installed in your browser via the TamperMonkey extension, and those that work inside of a Google Sheet. Below you will find a description of each enhancement, followed by installation instructions.
Security
All Canvas enhancements listed below have been reviewed and approved by the Office of Information Security (OIS). While there are links to additional scripts online and throughout the Canvas community, the list below has been reviewed and approved by the Office of Information Security (OIS). If you have a script that you would like added to this list, please contact us at oithelp@colorado.edu.
OIT-Provided Enhancements
Comments Importer
This browser enhancement allows instructors to post assignment comments in bulk from a spreadsheet. This tool will post all the comments just as if you’d added them to Canvas yourself, only without all the extra clicks.
Using Comments Importer
To use, first install TamperMonkey using your preferred browser, and then visit the Comments Importer source page. TamperMonkey will detect that you are trying to install this script and open an information panel. Click “Install” to proceed.
Once installed, visit the Grades area of your Canvas course and look for where it says “Import Comments.” Here is where you will upload your import file.

To create an import file:
- Start by exporting your gradebook. Look at the top of the Grades screen for an “Export” button or an “Actions” menu.
- Delete all columns except the SIS User ID column and whichever assignment columns you wish to post comments for (you can’t post to any “read-only” columns, so make sure you delete these).
- Delete any filler rows between the first header row and the list of students, like the “Points Possible” row.
- Replace the scores listed with the comments you wish to post for each student and assignment. Leave a cell blank if you do not wish to post a comment there.
- Your finished import file should look similar to this example comments import.
Copy & Offset Assignment Dates
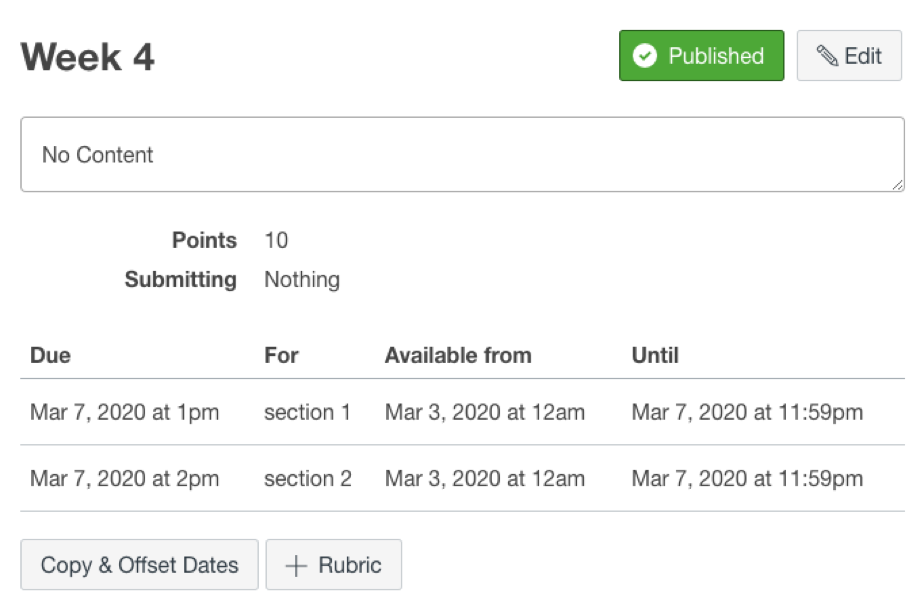
This browser enhancement allows instructors to quickly copy all the “Assign to” options and dates from one assignment to another while simultaneously moving dates forward or backward. This tool is useful if you have multiple sections, groups, or students with differentiated due dates for an assignment, and you want to repeat this arrangement for multiple assignments (such as weekly labs).
Using Copy & Offset Assignment Dates
To use, first install TamperMonkey using your preferred browser, and then visit the Copy & Offset Assignment Dates source page. TamperMonkey will detect that you are trying to install this script and open an information panel. Click “Install” to proceed.
Once installed, visit the Assignments area of your Canvas course and then click the name of the assignment you wish to copy dates from. At the bottom of the assignment details page, click “Copy & Offset Dates.” Then, specify the assignment you wish to copy these dates to and how much dates should be offset when copying.
Please be aware that all dates and settings in the “Assign to” area of the destination assignment will be deleted and replaced with the “Assign to” dates and settings of the source assignment.

Custom Columns Manager
This browser enhancement allows instructors to add and remove “custom columns” in the Canvas gradebook. Like the Notes column (learn about the Canvas Notes column), these columns include text information that is only visible to teachers and TAs. The data in these columns can be imported and exported. Once a custom column is added using this enhancement, all teachers and TAs in the course will be able to see and modify the column. You only need to install this enhancement if you wish to add or remove a custom column.
Using Custom Columns Manager
To use, first install TamperMonkey using your preferred browser, and then visit the Custom Columns Manager source page . TamperMonkey will detect that you are trying to install this script and open an information panel. Click “Install” to proceed.
Once installed, visit the Grades area of your Canvas course and look for the “+ Column” and “Delete Column” buttons in the gradebook toolbar.

Export Rubric Scores
This browser enhancement allows teachers to export all rubric scores for a single assignment to a spreadsheet. This is useful if you wish to analyze how students are performing on individual rubric criteria.
Using Export Rubric Scores
To use, first install TamperMonkey using your preferred browser, and then visit the Export Rubric Scores source page. TamperMonkey will detect that you are trying to install this script and open an information panel. Click “Install” to proceed.
Once installed, open Speedgrader for an assignment that uses a rubric (learn more: How do I add a rubric to an assignment?). In the toolbar at the top, click Export Rubric Scores, then wait for the file to download. This could take several seconds depending on how many students are in the course.

Import Rubric Scores
This browser enhancement allows teachers to import a spreadsheet of rubric scores or ratings to be posted for a single assignment. This is useful if you wish to fill out your students’ rubric scores/ratings in a spreadsheet before posting them to Canvas.
Using Import Rubric Scores
To use, first install TamperMonkey using your preferred browser, and then visit the Import Rubric Scores source page. TamperMonkey will detect that you are trying to install this script and open an information panel. Click “Install” to proceed.
Once installed, open Speedgrader for an assignment that uses a rubric (learn more: How do I add a rubric to an assignment?). n the toolbar at the top, click Import Rubric Scores, then choose the CSV file you wish to import. After reviewing and correcting any errors or warnings that appear in the pop-up, click “Import.”
The simplest way to generate the proper format for the import spreadsheet is to use the Export Rubric Scores enhancement to download a spreadsheet to use as a template. In the exported CSV file, delete the “Posted Score” and “Attempt Number” columns, as these can’t be imported. If your export includes both scores and ratings, choose one option to use for the import and delete all columns of the other type. Finally, enter your new scores/ratings and save the file before importing. Only students who appear in the import file will have their scores overwritten, and any blank cells will cause those scores/ratings to be erased if they exist.

Import Zoom Attendance
This browser enhancement allows teachers to turn a Zoom participants export, which shows who was present in a session, into a Canvas attendance assignment. Students are given credit for the assignment if they attended the Zoom session. This is useful for fully online courses where the instructor wishes to keep attendance. It could also be helpful in a hybrid course.
Using Import Zoom Attendance
To use, first install TamperMonkey using your preferred browser, and then visit the Import Zoom Attendance source page. TamperMonkey will detect that you are trying to install this script and open an information panel. Click Install to proceed.
Once installed, you’ll need to download a Zoom participants report for the appropriate class session. Use the Import Zoom Attendance into Canvas Gradebook tutorial for a step-by-step guide to this process.
Tips for Collecting Zoom Participation Data:
- When scheduling meetings, name the meeting the same name as your Canvas course to make it easily integratable.
- Choose to make the meeting recurring with an automatically generated Meeting ID (rather than your Personal Meeting ID). This will make it so that only those who you invite to that specific meeting can enter, and can prevent accidental meeting interruptions.
- Turn on the Only authenticated users can join option in the Zoom meeting settings to have students’ names captured correctly for importing into Canvas.
Save Rubric Row
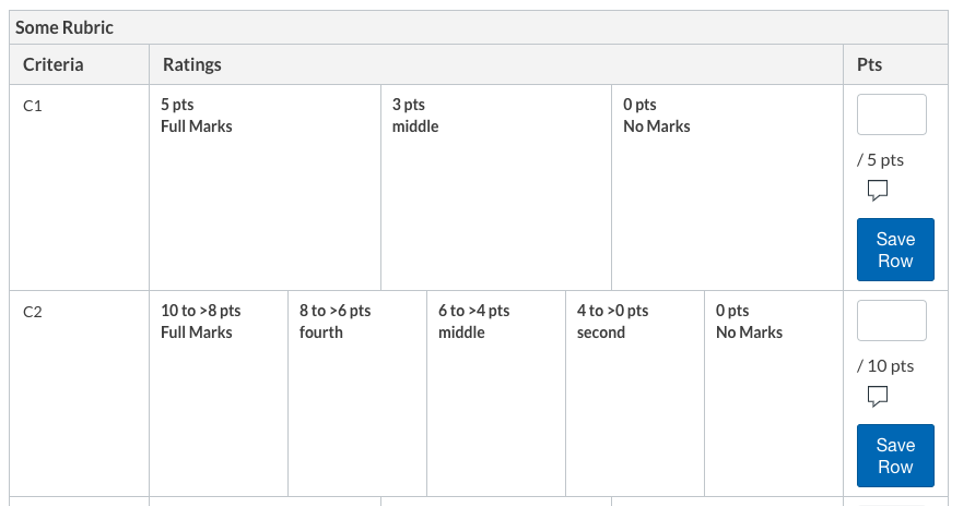
This browser enhancement allows teachers and TAs using Speedgrader to save the score/comments for just one row of a rubric at a time, rather than having to save all rows together. This is useful if multiple TAs are grading an assignment simultaneously, with each TA assigned a certain part of the rubric to grade. Without this enhancement, if a TA changes just one row of the rubric and clicks Save, even the unmodified rows will be re-saved, which could overwrite changes made by other TAs who are grading at the same time.
Using Save Rubric Row
To use, first install TamperMonkey using your preferred browser, and then visit the Save Rubric Row source page. TamperMonkey will detect that you are trying to install this script and open an information panel. Click “Install” to proceed.
Once installed, open Speedgrader for an assignment that uses a rubric (learn more: How do I add a rubric to an assignment?). In the right-hand panel, click “View Rubric.” Each rubric row/criteria will now have a “Save Row” button. This will update the score and comments for just this row of the rubric.
Note: Don’t click the “Save” button underneath the rubric. This will save all rows of the rubric, even if you didn’t modify them!

Speedgrader Word Count
This browser enhancement allows teachers to see the word count of documents within Speedgrader. This is useful if you need to verify students met a certain word count within their document.
Speedgrader Word Count
To use, first install TamperMonkey using your preferred browser, and then visit the Speedgrader Word Count source page. TamperMonkey will detect that you are trying to install this script and open an information panel. Click “Install” to proceed.
Once installed, open Speedgrader for an assignment that students have submitted documents to. In the toolbar at the top, you will see the document word count next to the page number.

Note: Different applications (Word, Google Docs, etc.) count words in different ways. If the word count shown is very close to a cutoff, you may want to download the document and open it in the program of your choice to confirm it.
Community-Provided Enhancements
| Name | Installation Type | What does it do? |
|---|---|---|
| Adjust all assignment dates on one page | Google Sheet | Allows instructors to adjust due dates/times, available from and until dates/times, change quiz show and hide answer dates/times, publish/unpublish assignments, mute/unmute assignments. |
| Assigning intra-group peer reviews | TamperMonkey | Allows the instructor to assign peer reviews based on group status. |
| Better group discussion navigation | TamperMonkey | Reduces the number of clicks instructors would need to make in order to navigate group discussions. |
| Bulk publish / delete pages | Google Sheet | Creates a Google Sheet that allows for the bulk publishing, unpublishing, and deletion of pages. |
| Count student discussion posts | Google Sheet | Creates a Google Sheet that tracks how many times each student has posted in any given discussion and the total number of discussion posts across the course. |
| Course roster enhancements | TamperMonkey | Allows the people page to be sorted by any column, printed to a PDF, and have a photo roster be printed. |
| Importing rubrics from a spreadsheet | TamperMonkey | Allows instructors to use Excel or Google Sheets to create a rubric and then copy/paste that rubric in Canvas. |
| List items alphabetically when adding to a module | TamperMonkey | Allows instructors to alphabetize the list of items when adding something to a module. |
| Obtaining access report data for an entire course | TamperMonkey | Places a button on the people page to download access report data for the entire roster. |
| Print Quizzes | TamperMonkey | Adds a button that allows instructors and TAs to print quizzes from the quiz preview page. |
| QuizWiz: enhancements to SpeedGrader and quizzes | TamperMonkey | Adds a considerable number of improvements and functionality to the SpeedGrader interface. Also allows for different regrading criteria for multiple answers, fill-in-multiple-blanks, and multiple dropdowns question types. *Not usable with New Quizzes. |
| Remove missing and late labels | TamperMonkey | Removes the missing and late labels from the New Gradebook. |
| Show student names for differentiated assignments | TamperMonkey | When you have an assignment with different due dates for students, groups, or sections, this script populates the assigned to field with the actual names of students instead of the number of students. |
| Sorting the find a rubric dialog | TamperMonkey | Since rubrics are account wide, this script makes it easier to find rubrics by automatically moving the current course to the top of the list while also giving additional sort and filter options. |
TamperMonkey
TamperMonkey is a popular browser extension that works with Chrome and Firefox. TamperMonkey allows you to install various userscripts that will run when in your browser or when you navigate to a specific web page. *Please Note: The TamperMonkey developer has ended support for Safari.
Installation with TamperMonkey
For Canvas enhancements that use TamperMonkey, installation is as simple as opening the script in the documentation, usually located underneath installation instructions. When TamperMonkey is installed on your browser, it will automatically recognize that you are trying to install a script and will prompt you to install it. View a list of userscripts that you have installed by clicking the TamperMonkey icon in your browser and selecting Dashboard.
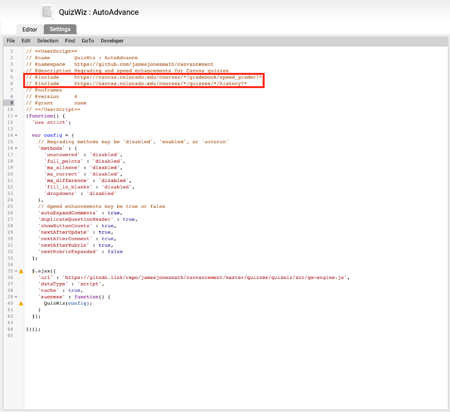
You may need to edit the script to make sure that it is going to run on our Canvas environment. From TamperMonkey’s dashboard click on the userscript you want to edit, which will open the script editing page. Change the @match or @include lines to canvas.colorado.edu.
Google Sheets
Google Sheets is Google’s spreadsheet creation and editing tool.
Installation with Google Sheets
For Canvas Enhancements that use Google Sheets you will need to open the provided, custom Google Sheet and save a copy to your CU Google Drive. *Please Note: Google Sheet Canvas Enhancements will not work if you are not using your CU Google account. Additionally, you will need to authorize the connection between your Canvas account and CU Google account before using. You can do this by using the Google Drive button in the Rich Content Editor.
In the Canvas menu of the spreadsheet, you will need to identify the hostname and specify the Canvas course that the spreadsheet pulls data from. Our Canvas hostname is canvas.colorado.edu and your course link will be canvas.colorado.edu/courses/xxxxx.
You will also need to generate an API token. This token allows the spreadsheet to pull data from your canvas course. Do not share this token with anybody: treat like you would your account password and keep it secure. Once you create a token you will no longer be able to view the token after you close the window, nor will you be able to access the token again after you place it into the spreadsheet. For more information about generating API tokens follow Canvas documentation for managing API access tokens.
Help and Resources
- Original Canvas enhancement community page
- If you need help installing, troubleshooting or finding the right Canvas enhancement for your needs, please submit the consultation request form to meet with one of our Learning Technology Consultants.

