
Large Lecture Hall Touch Panel Guide

Use this tutorial to assist in the operation of the touch panel in Large Lecture Halls. For a one page physical copy of this guide, download the quick start guides:

Please Note: Large Lecture Halls should have copies of the Quick Start Guide .pdf located near the touch panel. 

Layout:
one column
two columns

Step

Tap the screen anywhere to wake the panel. Connect your device or tap Press here to begin.

The power button can be used to turn the system off after use. 

Step

Use the menu on the top of the touchscreen to navigate through your options.

  • Source: Select what type display to use (Laptop, Document Camera, Wireless AV)
  • Menu: Navigate through pages in the touch panel 
  • Camera: Preview and control cameras manually

Step

To show laptop content on display, select Laptop from the source list and connect your laptop using the supplied cables.

Step

To show Document Camera content on display, select Document Camera from the source list and turn the Document Camera on.

Step

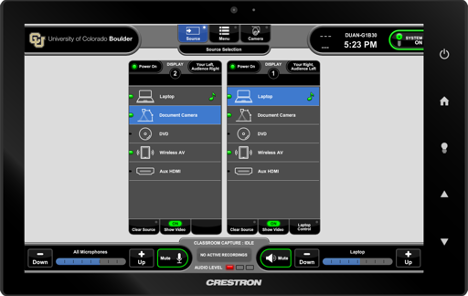
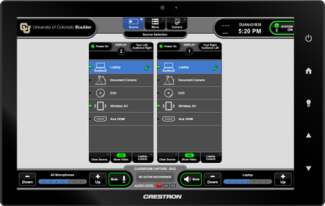
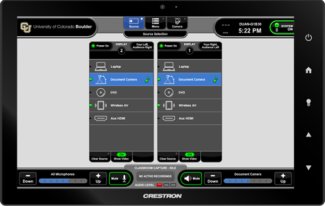
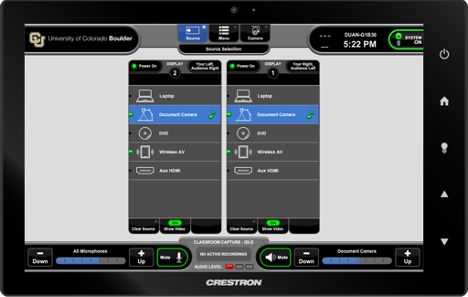
Be sure to select a source for each display. A description of the display location is located in the top right corner of each display selection box. (e.g. Your Left, Audience Right)

Please note: Audio will play from the last selected display source, indicated by the highlighted music note (e.g. Laptop on Display 1, in this example)

Step

Adjust volume for microphones on the bottom left, and the connected device (Laptop, DVD, etc.) on the bottom right