
Kaltura - Adding Kaltura Media to a Canvas Course

This tutorial will cover the process of adding Kaltura media to a Canvas course. For guidance on adding media to Kaltura, please consult the Uploading Media to Kaltura in Canvas tutorial.

Kaltura media can be added anywhere in the course where the Rich Content Editor appears. The Rich Content Editor can be used in Announcements, Assignments, Discussions, Pages, Quizzes, and Syllabus. The recommended way to share a video file with your course is to add it to a new Page. That page can then be added to modules and organized in a sequence. If you don’t need to organize your videos or add them to modules, you may consider using the Kaltura Media Gallery for a more streamlined approach to sharing your content with students.

Note: My Media is a private user-specific video repository. Any media published only to My Media is not visible to anyone else in the course until you add it to a Page, Announcement, Discussion, or other published content visible to students.

Layout:
one column
two columns

Step

Navigate to the part of your course where you would like to add the media. You can insert Kaltura media anywhere there is a Rich Content Editor (Announcements, Assignments, Discussions, Pages, Quizzes, and Syllabus).

Step

Select the Apps icon.

Step

Choose Embed Kaltura Media.

Step

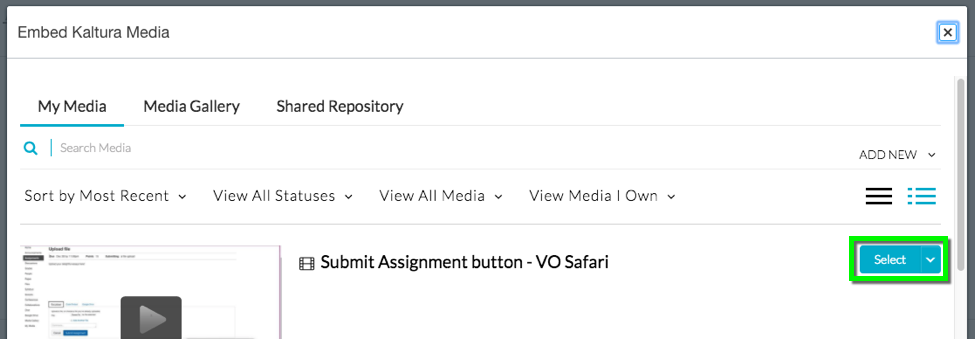
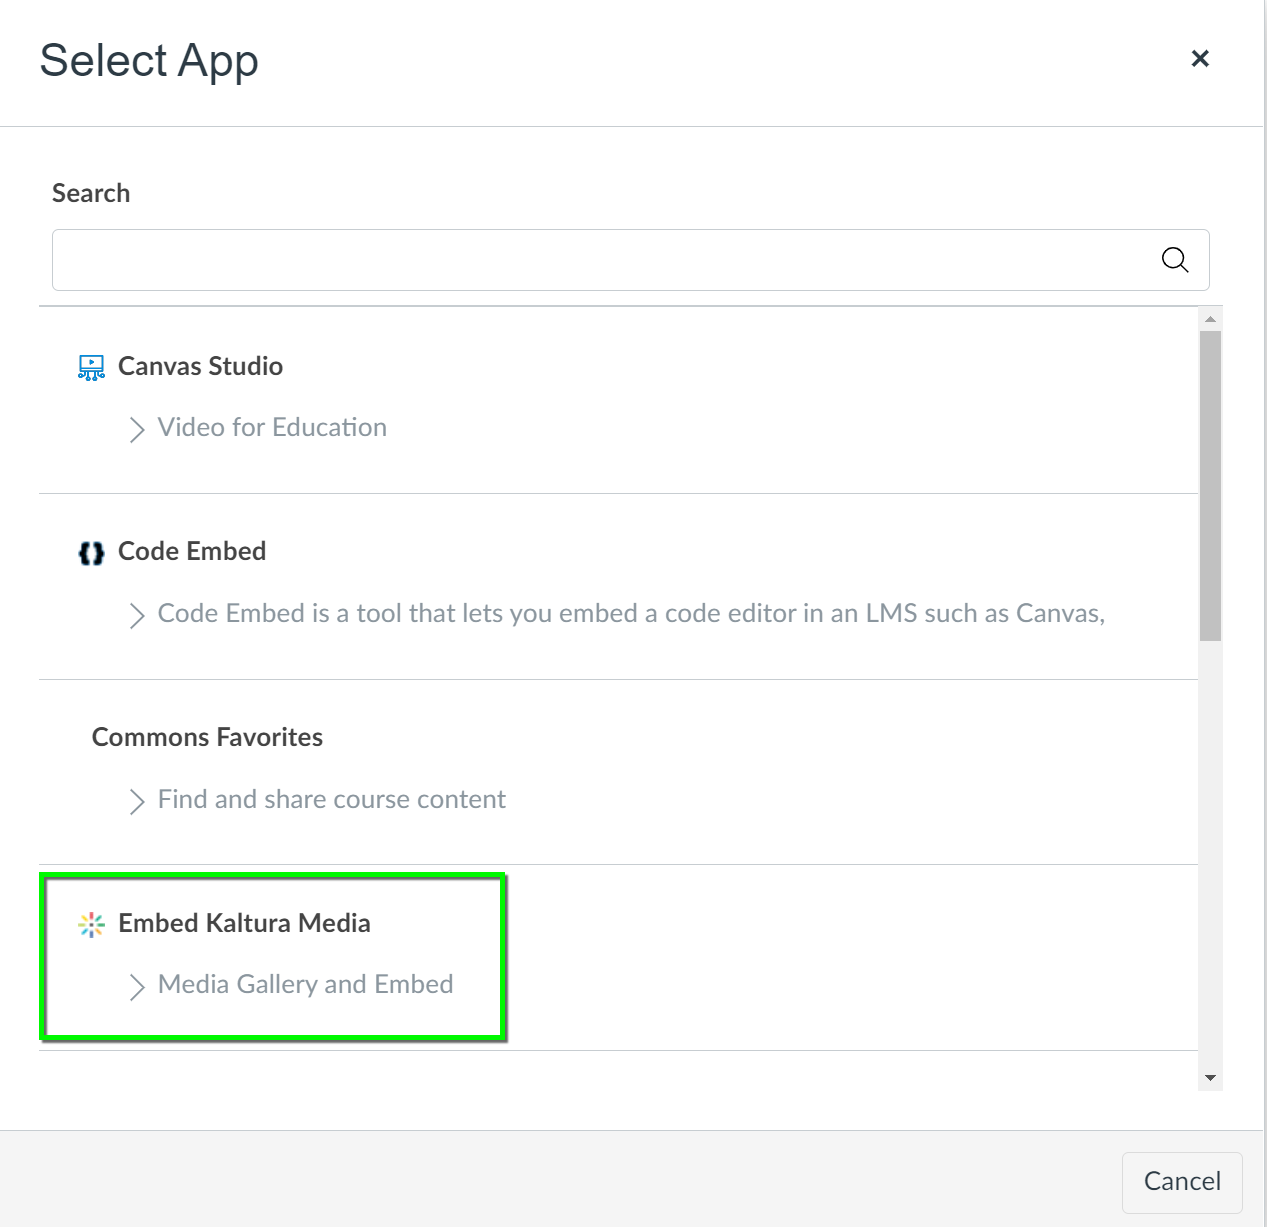
The Embed Kaltura Media dialog box will open. If you have already uploaded the content you wish to use via My Media, locate it under My Media and choose Select.

For guidance on uploading media to Kaltura, see the Uploading Media to Kaltura in Canvas tutorial.

Step

If you have previously uploaded content to Kaltura, the media is still available under the Shared Repository tab. Select it, and search for your content, then choose Select to add the media.

Step

The video will now appear in your Rich Content Editor window. Select Save to save your new content item.