Static IP Configuration - Windows 7

  • To request a static IP address, please go to http://hippo.colorado.edu/ and select Static IP Address Application.
  • Static IP addresses on the CU Boulder campus must be assigned by OIT or other designated network administrators. A static IP address must be manually entered into a device, along with router address, subnet mask, DNS server addresses and domain information.
OS:
Layout:
one column
two columns

Step

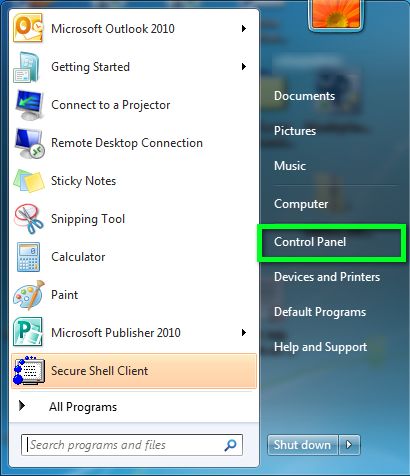
Click the Start menu. Next, click on the Control Panel option.

Step

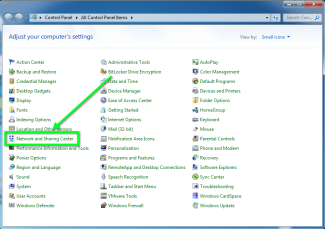
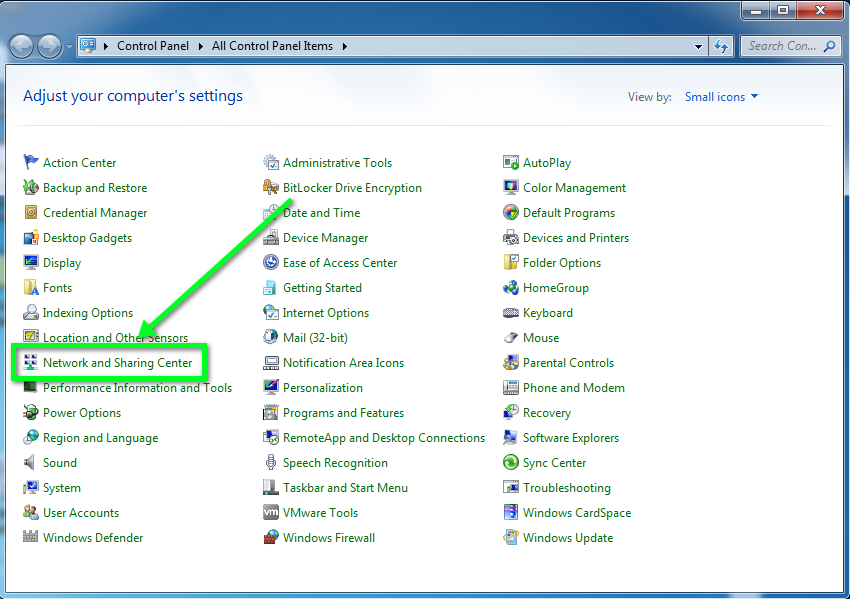
Click on the Network and Sharing Center option.

Step

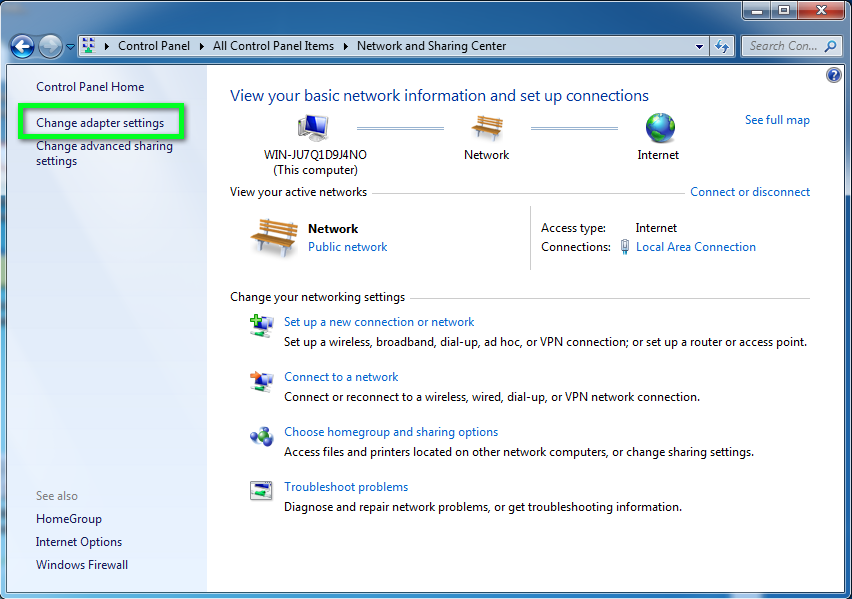
Click on Change adapter settings from the left side menu.

Step

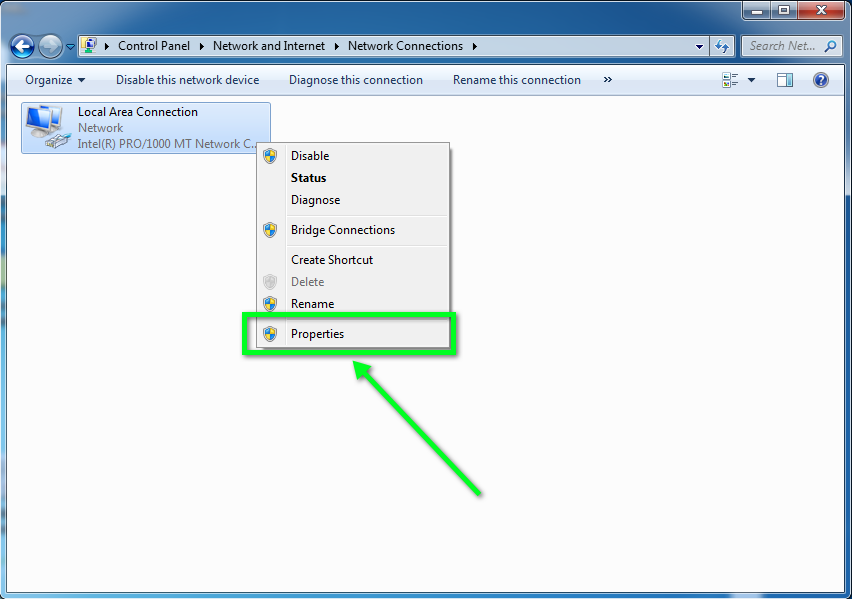
Right-click on the Local Area Connection icon, then select Properties.

Step

In the window that opens, click on the Internet Protocol Version 4 (TCP/IPv4) (you may need to scroll down to find it). Next, click on the Properties button.

Step

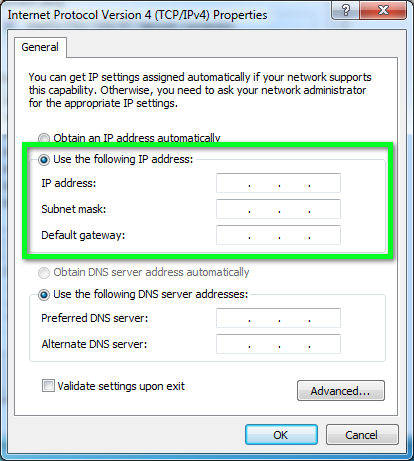
In the window that opens, click the Use the following IP address: radio button. In the IP address:, Subnet mask:, and Default gateway: number fields, insert the numbers that were assigned to you by OIT.

Step

Next, click the Use the following DNS server addresses: radio button. Next, in the Preferred DNS server:, and Alternate DNS server: number fields, input the numbers that were assigned by OIT. Then click the OK button.

Step

Click OK in the other window. You can now start using your new internet connection. If for some reason the internet connection doesn't start working right away, restart the computer and try again.