April 2026
Studio Media Embedding Enhancements
Studio media embedding includes enhancements that provide flexibility and control when adding videos within the Rich Content Editor (RCE). Instructors configure how media displays and can update settings directly in the editor without re-embedding or returning to Studio.
- Multiple Embed Views: Select from Thumbnail, Learn, Collab, or Quiz views to match teaching needs.
- Viewer Restrictions: Configure playback behavior, including speed control, download permissions, and transcript visibility.
- Transcript and Captioning: Utilize rolling transcripts with synchronized playback, inline editing, and caption management.
- Media Options Panel: Adjust player size and viewer restrictions from a centralized location.
- Inline Quick Menu: Change the embed view directly within the RCE edit mode.
For more information please see Studio Release Notes.
January 2026
Assisted Caption Review
Assisted Caption Review is a caption editor feature that helps video creators by identifying and highlighting potential inaccuracies in auto-generated captions.
For more information, please see Instructure's article, How do I use Assisted Caption Editing in Canvas Studio?
September 2025
Enhanced YouTube experience with Canvas Studio
Canvas has partnered with YouTube to provide an enhanced educational YouTube Experience through Canvas Studio. YouTube content that has been added to a users Canvas Studio library or converted using the YouTube MIgration tool from the Canvas course will gain the following benefits:
- All embedded YouTube content will retain YouTube captioning to maintain accessibility
- All embedded YouTube content will prevent ads, recommendations, or links back to YouTube
- Learn how to add YouTube content to Canvas Studio or how to convert YouTube content from a Canvas course
- For more information on this recent update, please see Instructure's YouTube Player for Education FAQs.
July 2025
Media Archive and Restore
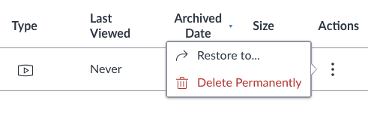
Media archiving in Studio allows users to remove videos from the main library without permanently deleting them. The Archive option replaces the Delete option, giving users the ability to manage and restore content as needed from the Archive collection.
- To fully delete Canvas Studio content, go into the Archive folder and select Delete Permanently.
- To move archive content back to the library, go into the Archive folder and select Restore to....
April 2025
Media Player Update
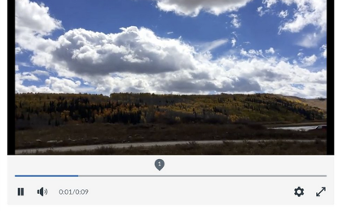
The media player playback experience has been improved with enhanced accessibility, adaptive streaming, and privacy features:
- The play bar is redesigned and repositioned.
- Redesigned and allows for full-screen playback. Additionally, the Closed Caption icon is updated.
- An open-source media player is integrated to align with the Canvas design pattern.
- Keyboard accessibility is improved with the addition of a hidden shortcut icon.
- For more information, see Studio Media Player Keyboard Shortcuts
- Privacy measures are enhanced to ensure secure playback.
- Video quality automatically adjusts based on available bandwidth.
- The ability to upload and delete closed captions.
- For more information, see How do I use the Caption Editor to edit a caption file?
This update provides better usability, accessibility and integration, offering a more intuitive design, improved navigation, and greater compatibility with Canvas. These updates streamline the user experience while maintaining familiarity and long-term support
The interface is updated for Studio quizzes. The question markers display the question number instead of a generic question mark.
The interface has been updated for Comments
January 2025
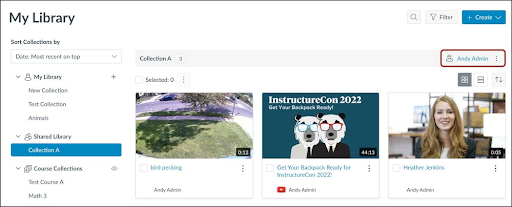
New Studio Library Layout
Users can access their personal videos, shared content and course collections from the updated navigation panel. This gives users a comprehensive view of their Library at a glance.
- On the My Library page, by default, the most recently uploaded media are displayed first.
- Shared media is in the Shared Library expandable section.
- Course collections are in the Course Collections expandable section.

List View
Users can view their Library in List View to view more content at once and reduce the need for scrolling.
To change the Library layout, click the List View icon. This selection will persist in the user's browser, allowing users to set their default view (grid or list) how they want.

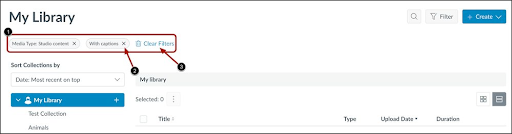
New Filters
Users can filter by captioned media, media types, tags and date ranges.
- These filters display as labels [1] and can be easily removed to refine searches [2]. To remove all filters, click the Clear Filters link [3].
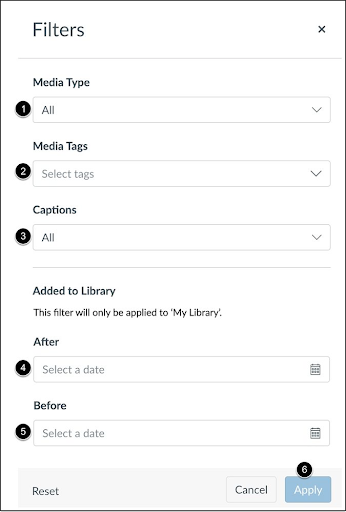
- Users can filter by media type (Studio content, Zoom, YouTube or Vimeo) [1], tags [2], captioning status [3] or upload date (users can select an "after" date [4] and a "before" date [5]).
- To apply any selected filters, users will click the Apply button [6].
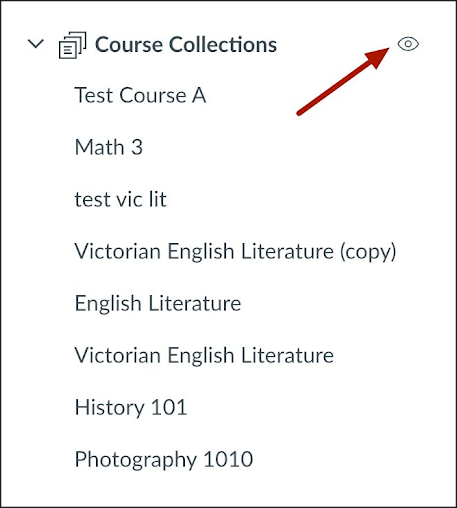
- To switch between all courses or show only active ones, click the Eye icon. This selection will persist in the user's browser.
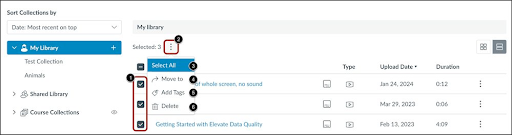
Bulk Action Addition
Users can use bulk actions to move multiple videos to a collection, delete multiple videos, or add tags. This feature allows users to save time while managing large quantities of Studio content.
To move, delete or add tags:
- Tick the checkbox next to the video [1].
- Click the Options icon [2] and then choose whether to Select All videos [3], Move to [4], Add Tags [5] or Delete [6].
Improved Content Search
The search functionality is updated to make finding and viewing videos easier. When users search for a video, they can instantly view its location in their Library.
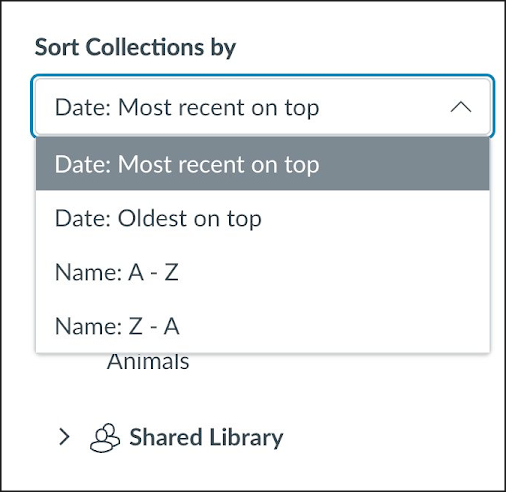
Library Sorting Update
Users can sort collections and media separately using one of four sort options: Most recent date on top, oldest date on top, alphabetically A to Z, or alphabetically Z to A.
Adding New Collections
In the My Library navigation menu, users can click the Add icon to add a new collection.

Shared Content Update
When users interact with shared content, the name of the collection's owner is displayed at the top of the page.
July 2024
Auto-Publishing Captions
Auto-publish settings allow users to run captioning and publishing automatically. This update simplifies the admin workflow by providing automatic functionality that allows instructors and students to select auto-publish settings for their own media.
In Canvas Studio settings, the Personal settings page allows users to easily manage personal user settings for captioning media and receiving email notifications.

Turn on the Enable Auto-Publish for Automatic Captions toggle to automatically publish captions as they're generated. (This option is only available if turned on by an administrator.)
May 2024
Studio Global Navigation Redesign
Studio Global Navigation is redesigned to be more consistent with Instructure and Canvas design. This update helps align aesthetics and workflows between Instructure products.

Manage Picture-in-Picture Display
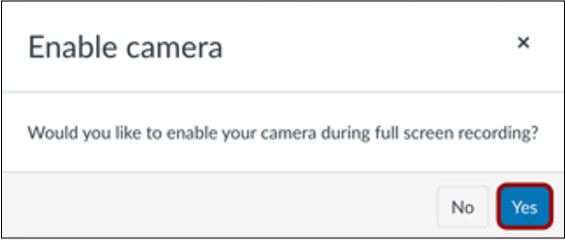
Google and Edge browser users with Screen Capture enabled can create a picture-in-picture window to display video from their webcam when sharing their entire screen.
In the Entire Screen tab, when Screen Sharing is initiated, the Enable camera window will display. To enable your camera and create the picture-in-picture display, click Yes.
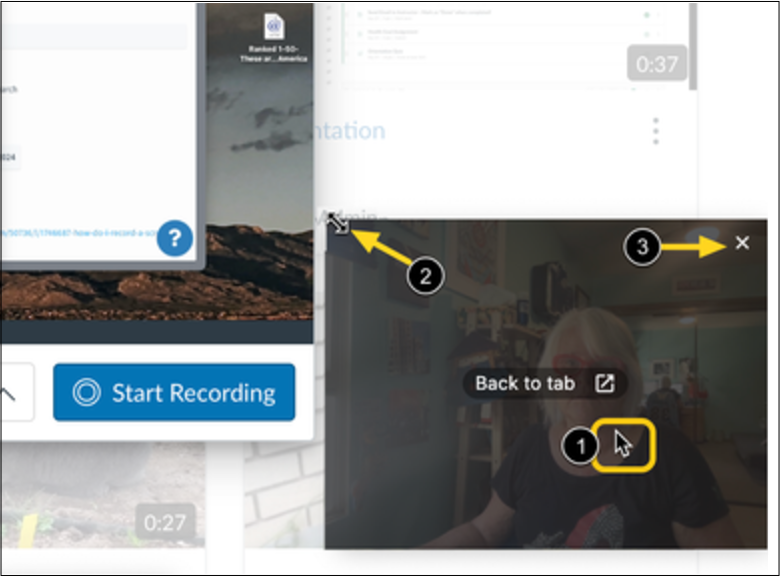
By default, the picture-in-picture display appears in the lower right-hand corner of your browser. In the screenshot below, the numbers correspond to the bracketed numbers in the bullets below.
- To move the display, click and drag it to a new location [1].
- To resize the display, position your cursor at a corner of the window until the Resize cursor [2] appears. Click and drag to resize the window.
- During recording, the picture-in-picture display can be displayed or hidden at any time. To close it, click the Close icon [3].