Managed Services - Client Certificate Installation

OS:
Layout:
one column
two columns

Step 1

Download and save the appropriate client certificate for the system you need access to your local hard drive from here.

Step 2

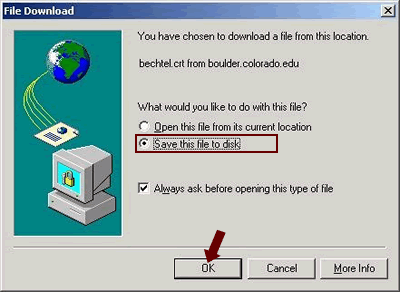
Once you have clicked on one of the certificate links, you'll be presented with the File Download menu.

Step 3

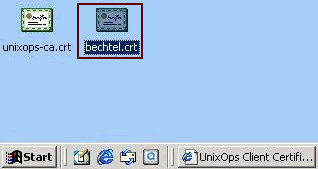
Save the file to disk, and remember where it is. Your desktop may be the easiest place.

Step 4

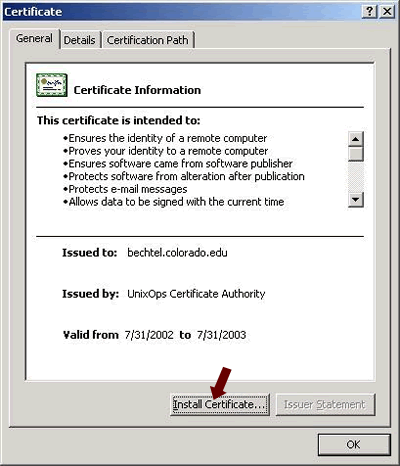
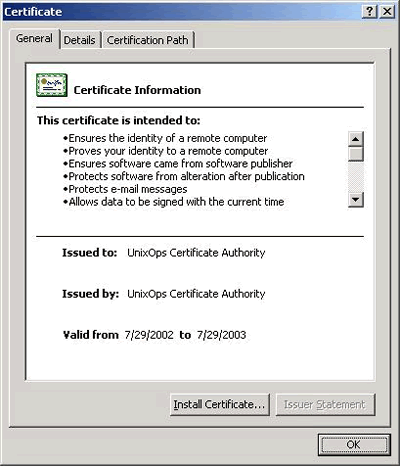
If you see a yellow warning triangle at the top of the certificate, you haven't installed the root certificate yet. Follow these directions first before proceeding.

Step 5

Otherwise, if this is the correct certificate (look at the Issued to: line), click the Install Certificate button.

Step 6

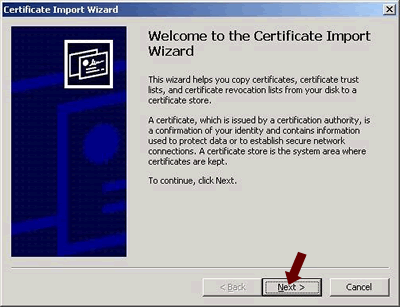
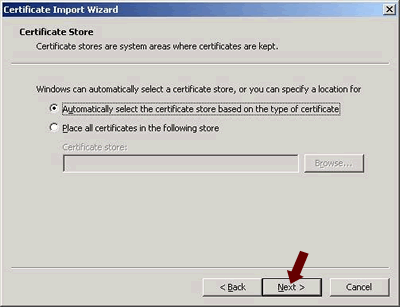
Click the Next button.

Step 7

Click the Next button again.

Step 8

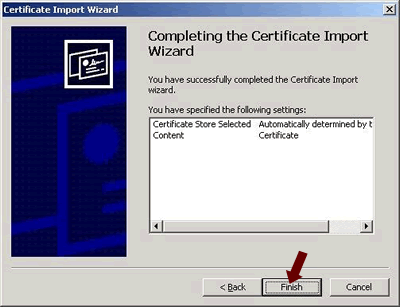
Click the Finish button.

Step 9

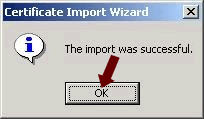
You should see The import was successful dialog box. Click OK, and you're done.

Step 10

You should see The import was successful dialog box. Click OK, and you're done.

(Note: If this is the first time installing this certificate, you will still see a red X at the top.Click OK and close it. If you double click the certificate again, you will see that it is now trusted.)

Step 11

Ensure you have installed the client certificate as well. If you have not already done this, instructions are available here.