Step 1
Investigating FileVault Issues
The following items are required for enabling FileVault and escrowing the recovery key to Jamf. Please confirm all of the following are in place.
Step 2
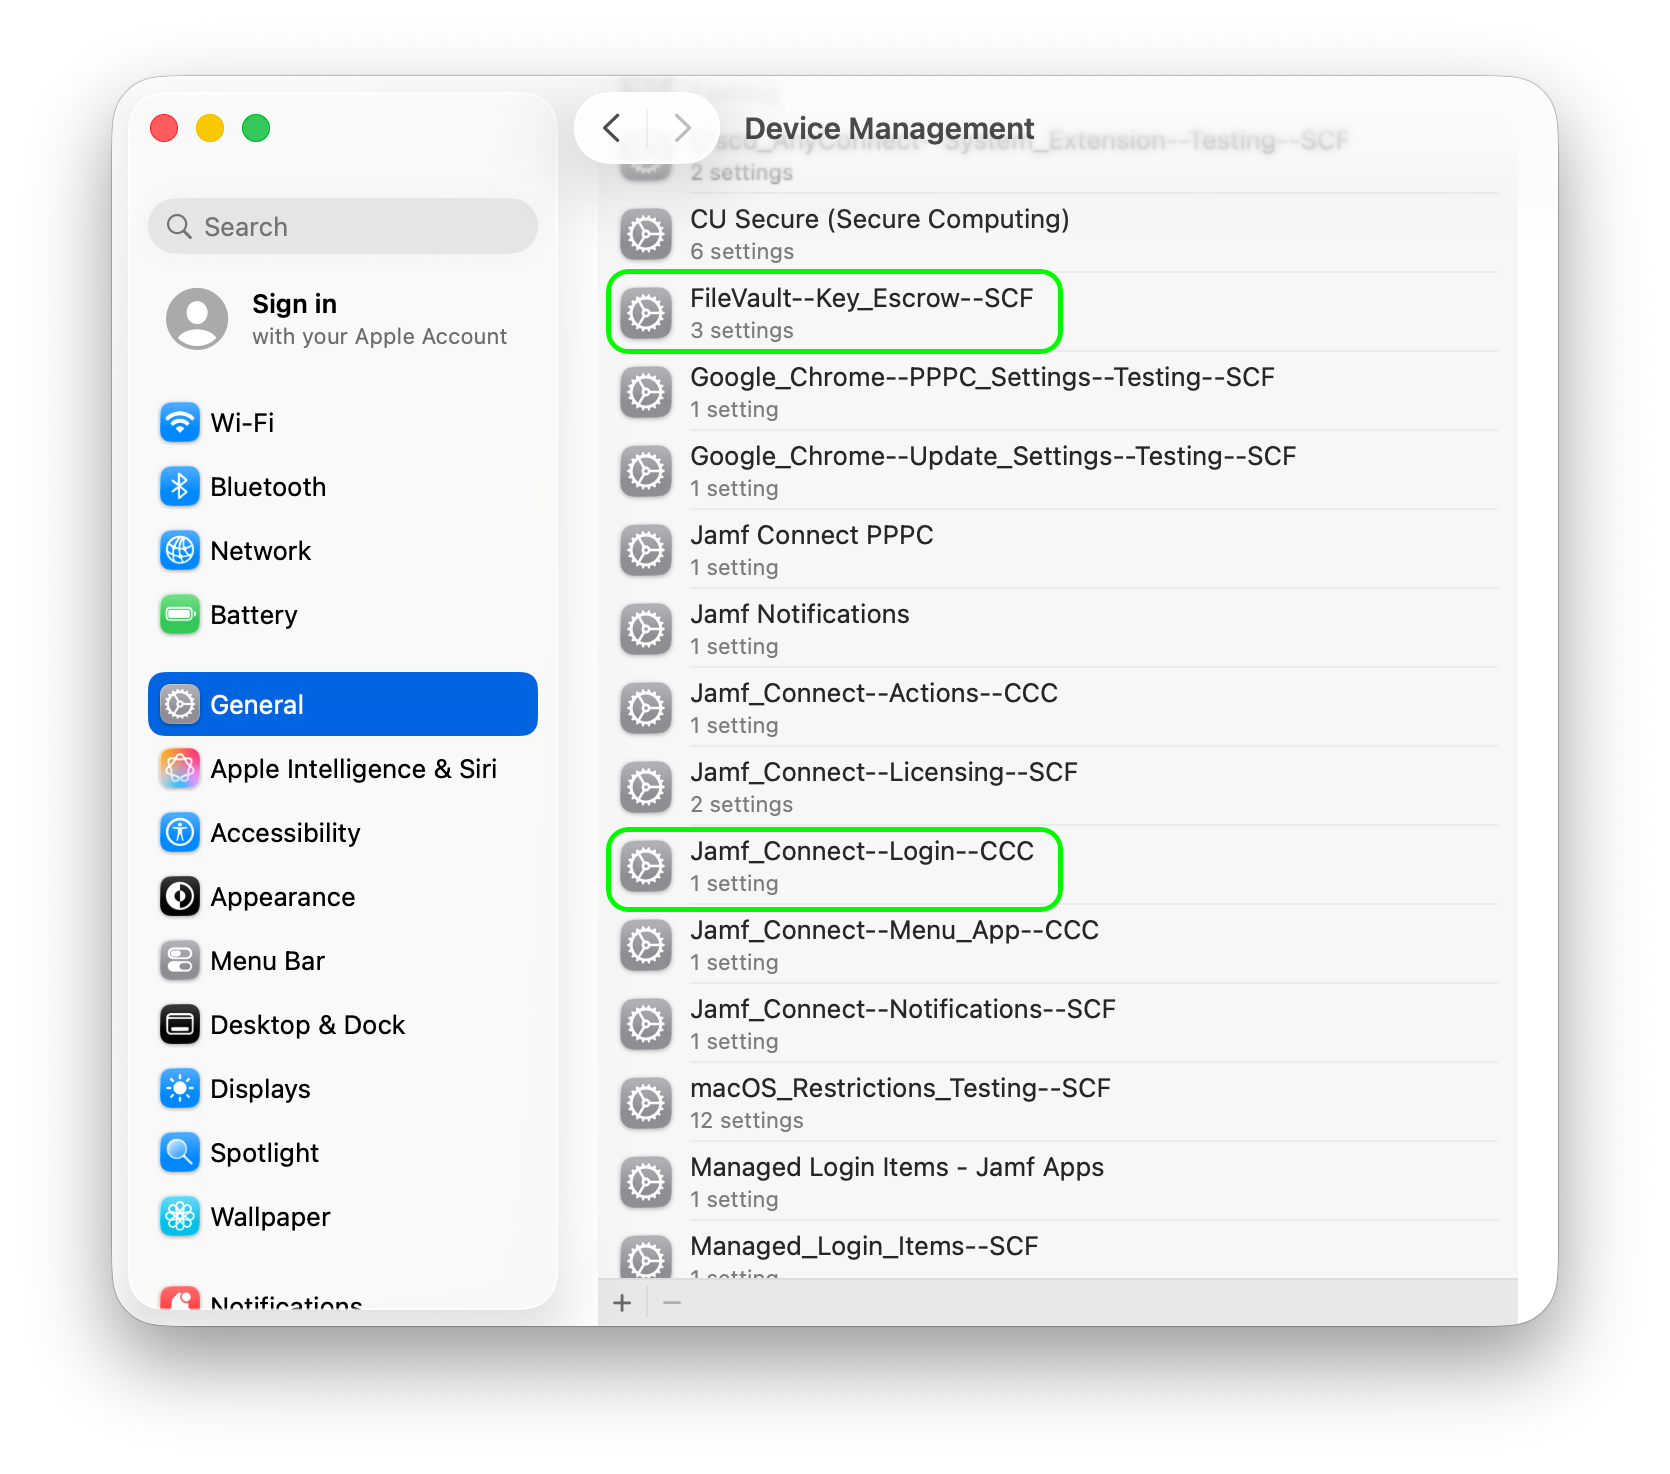
Jamf Connect: This login window plugin is the mechanism by which FileVault is enabled in Secure Computing and handles distribution of Secure Tokens to users. The presence of the CU menu item is a quick way of confirming it's installed. You'll otherwise find it within the Self Service application bundle (/Applications/Self Service.app/Contents/MacOS/Jamf Connect.app).

Step 3
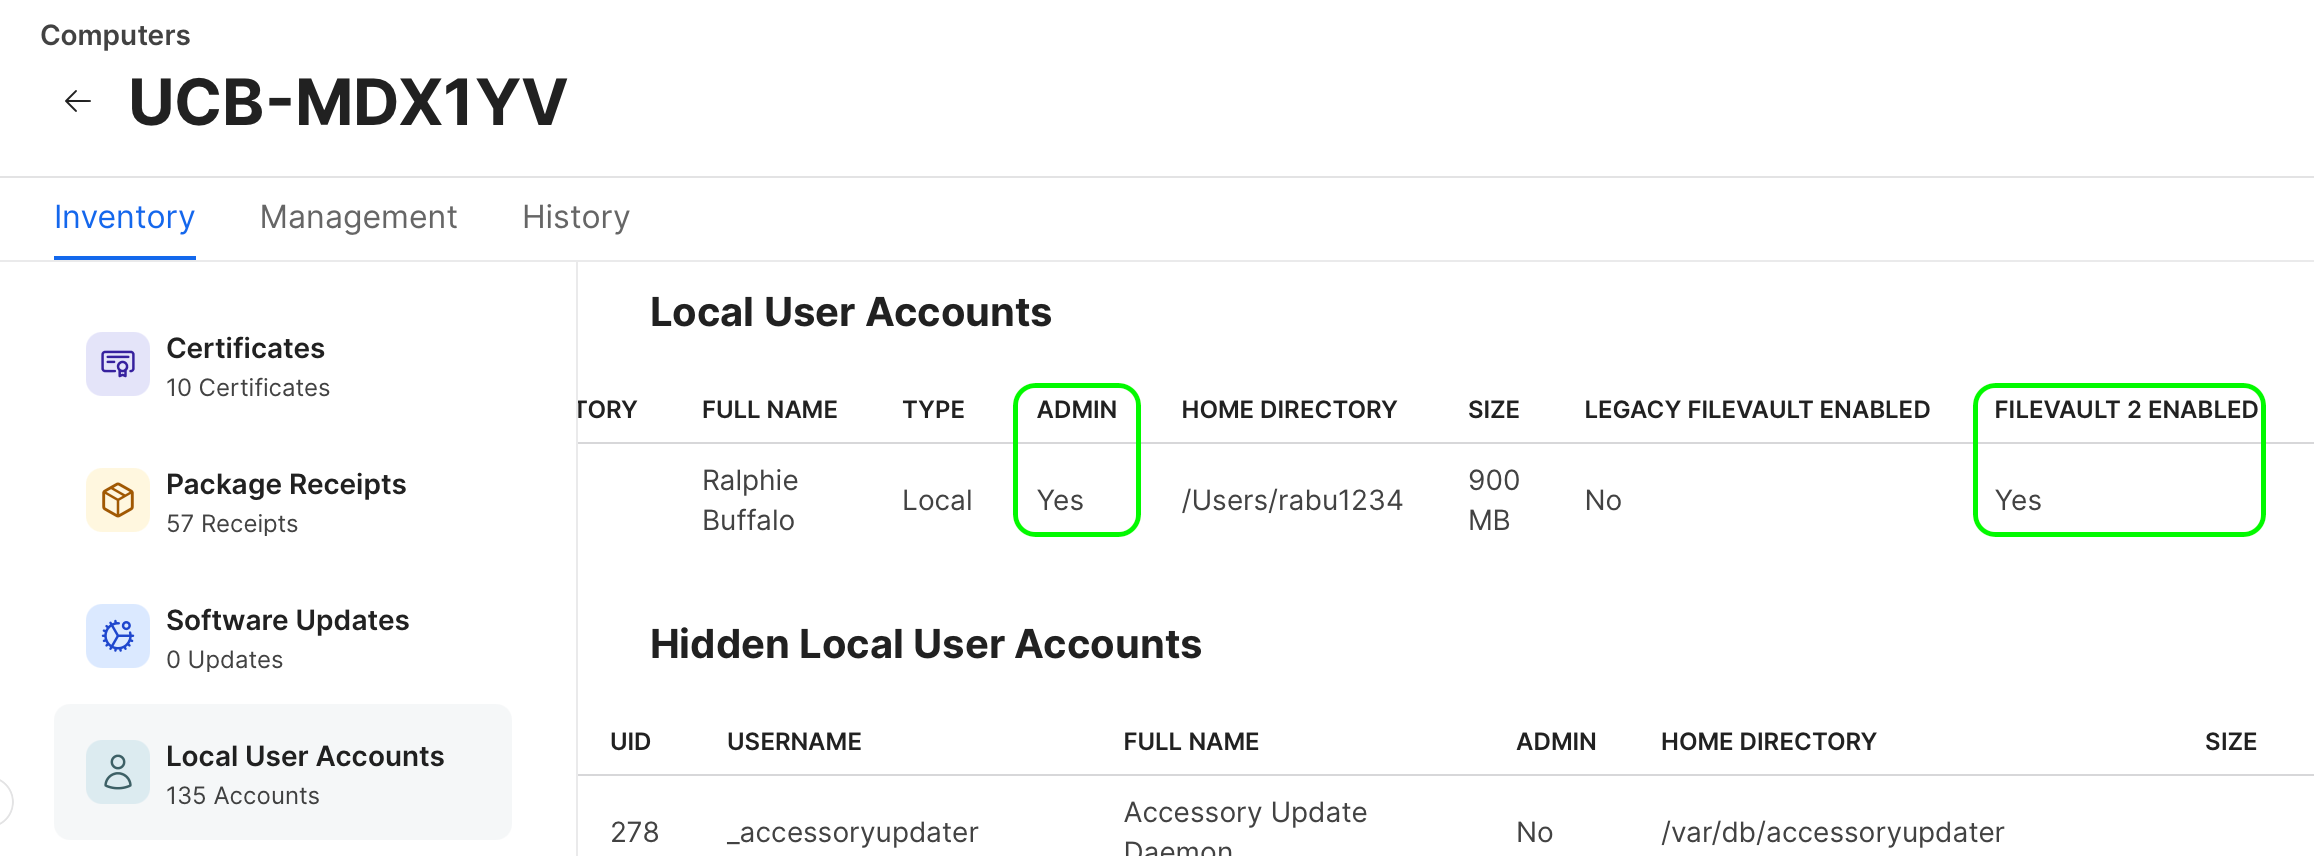
Admin privileges: FileVault must be enabled by an admin account. Ideally this account should also have a secure token, but it is not strictly necessary. The first account to login through Jamf Connect following setup will automatically be granted admin access to the machine. Please note that accounts created later do not receive these privileges automatically.

Step 4
Secure Tokens assigned to users: Once enabled, FileVault encryption can only be unlocked by user accounts that have received a Secure Token. Every account created by logging in through Jamf Connect should receive one automatically. You may view this list by running "sudo fdesetup list" in Terminal on the computer.
- If the admin account manually enabling FileVault does not have a token, then a user that does have a token will need to input their credentials to complete the process.
- If there are no users with Secure Tokens or if ciscoacvpnuser is the only one listed, the computer must be erased and run through setup again.
- Visit Apple's website for more about the deployment and management of secure tokens


Step 5
Set Configuration Profile: Either one of the following profiles configure various settings relating to Jamf Connect or FileVault. Confirm installation on the computer in System Settings/General/Device Management.
Jamf_Connect--Deploy--<DEPT>
- This gets replaced after the first user account is created on the system. You should not see these two profiles present on a system at the same time.
Jamf_Connect--Login--<DEPT>
- Replaces Jamf_Connect--Deploy--<DEPT> after the first user account is created on the system. You should not see these two profiles present on a system at the same time.

Step 6
Step 7
Remediating FileVault Issues
If all of the above check out, you should be able to enable FileVault in System Settings/Security & Privacy/FileVault. Turn FileVault on there, provide the appropriate admin and secure token credentials when prompted, and then confirm the recovery key will escrow to casper.colorado.edu. Then open Self Service and submit an inventory update there to ensure the recovery key is escrowed immediately.