Creating accessible HTML course content will help ensure all students can access your course content. This checklist covers a variety of accessibility best practices for the Rich Content Editor in Canvas.
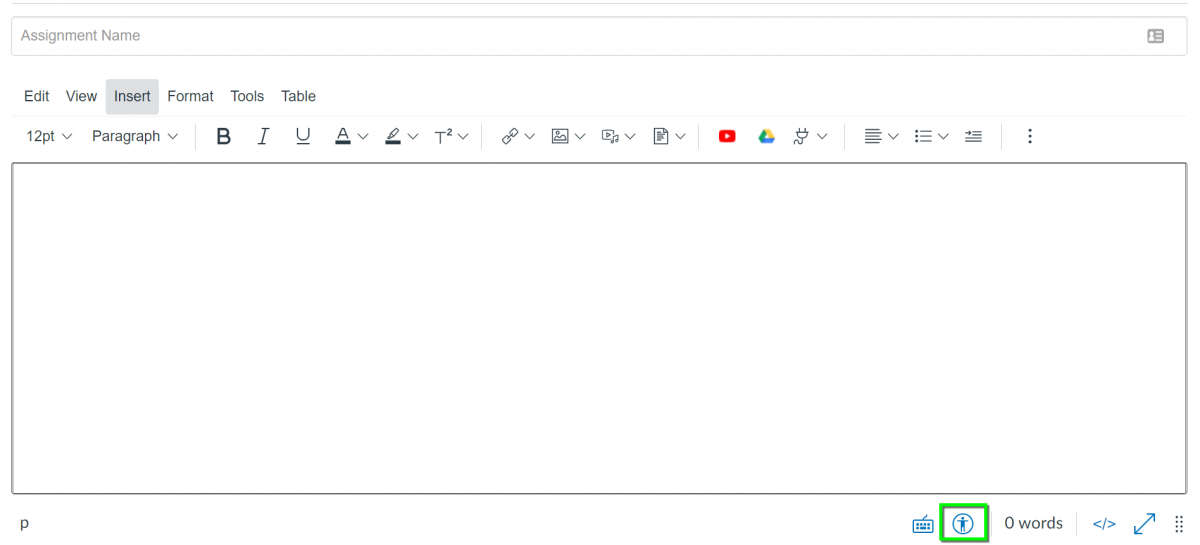
Run the Accessibility Checker
Canvas's built-in accessibility checker will catch 11 different issues, including heading structure and missing alt text for images. Details on every item tested for can be found on Canvas's Accessibility Checker tutorial.
The accessibility checker can be launched with the "Check Accessibility" button at the bottom of the Rich Content Editor.
Tables
- Don't use tables for layout; tables should only be used for storing data.
- Add row and column headings to your table.
- Add a caption to your table to contextualize its purpose and content.
- Learn more: Table Accessibility in Canvas
Lists
- Use the list buttons in the Rich Content Editor toolbar to create a list. Don't create lists manually by typing numbers or asterisks at the beginning of each line.
Learn more: List Formatting Accessibility Overview
Link Text
- Ensure that your link text describes the destination. Link text should not contain the URL unless it is short and will be memorized (e.g., colorado.edu).
- If you are linking to a document, indicate the file type of the document in brackets at the end of the link text.
- Learn more: Link Accessibility Overview
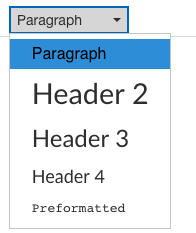
Headings
- Style all of your section headings with the Header styles listed under the Paragraph drop-down menu. Use them in a logical hierarchical order; heading levels should increase in number with the increasing specificity of the header topic, and they should be used consistently throughout a page. For example, the broadest topics should be Header 2, and subtopics of those should be Header 3.
- Learn more: OIT's Canvas Accessible Content Structure tutorial.
Color Contrast
- Ensure your text has good color contrast against its background. You can test color contrast using the WebAIM color contrast checker or the accessibility checker described above.
Images & Multimedia
- Describe all of your images with alt text.
- Alt text can be added in the Insert/Edit Image dialog box that appears when you select "Embed Image" in the content editor toolbar.
- The text should explain the content of the image to someone who cannot see it. Include only as much detail as is needed to convey its purpose or meaning.
- If the image is purely decorative and contains no content, you should select the Decorative Image checkbox option rather than adding alt text.
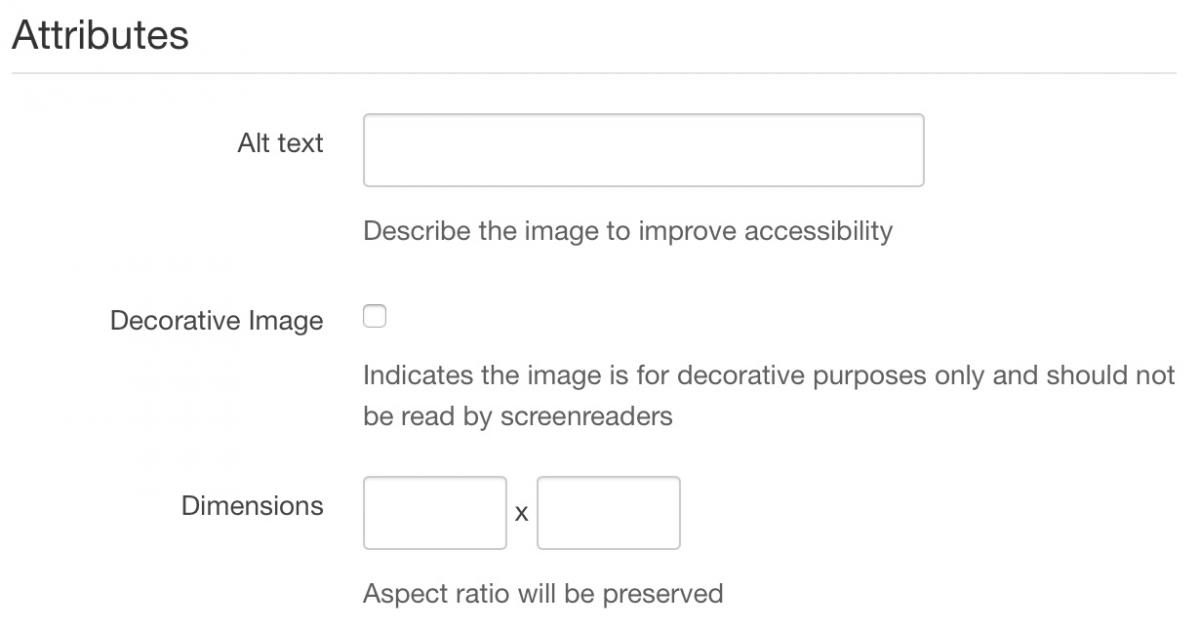
- Tip: If you didn't add alt text when you first added the image, you can add it later by selecting the image and then selecting the Embed Image button in the Rich Content Editor (RCE) toolbar.
- Learn more:
- If you have videos in your course, consider adding captions. If you have audio files, consider adding a transcript.
- To learn more about captioning, visit the Digital Accessibility Office captioning website.
External Documents
- Consult the CU Boulder Accessible Technology Resources page for tutorials on creating accessible Word documents, PowerPoints, Google Docs, and more.
- Canvas also provides a short list of recommendations for designing accessible documents.
Content for this page modified from the Online Education Initiative under a Creative Commons license.