
Gmail - Configure Outlook for Windows

This tutorial demonstrates how to configure Microsoft Outlook 365 for @colorado.edu Gmail accounts on Windows. If you haven’t already, please upgrade to the latest version of Outlook by downloading from the Microsoft 365 Apps page, or from Software Center on your device (DDS customers only). 

OS:
Layout:
one column
two columns

Step

In Outlook, open the File Menu, then click Add Account.

Step

Enter IdentiKeyUsername@g.colorado.edu in the email field (not first.last@colorado.edu). Click Advanced options, select Let me set up my account manually, then click Connect.

Step

Click Google

Step

Enter your IdentiKey password then click Connect.

Step

You may get a popup asking for your password again, if so click Cancel.

Step

Click Change Account Settings.

Step

Enter the following server information:

  • Incoming Server: imap.gmail.com
  • Incoming Port: 993
  • Incoming Encryption method: SSL/TLS
  • Outgoing Server: smtp.gmail.com
  • Outgoing Port: 465
  • Outgoing Encryption method: SSL/TLS

Click Next.

Step

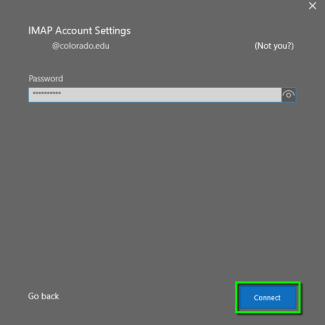
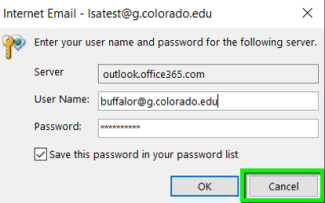
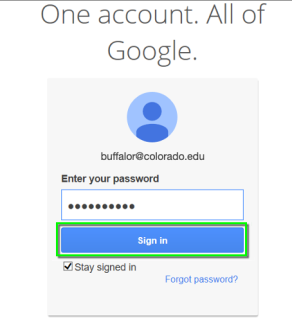
If prompted, enter your IdentiKey password again and click Connect.

Step

Enter your IdentiKeyUsername@colorado.edu address in the email field (not first.last@colorado.edu), then click Next.

Step

Enter your IdentiKey password, then click Sign in.

Step

If prompted, review the permissions and click Allow.

Step

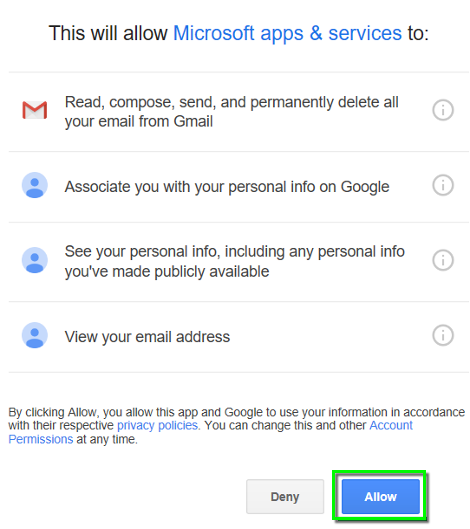
If prompted, repeat steps 9-11 again.

Step

Uncheck both boxes then click Done.

Step

Click File, open the Account Settings dropdown, then click Account Settings.

Step

Click to select your account listed as IdentiKeyUsername@g.colorado.edu, then click Change.

Step

  • Enter your desired Display name in the Your name field.
  • Change Account name and Reply-to address to your First.Last@colorado.edu email address.
  • Set your Organization if desired.
  • Uncheck Don’t save copies of sent items
  • Click Next then Done then Close.

Step

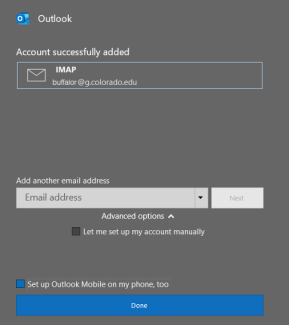
 Close and reopen Outlook; your email is configured and messages should begin syncing.
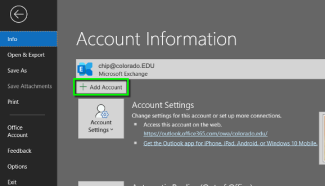
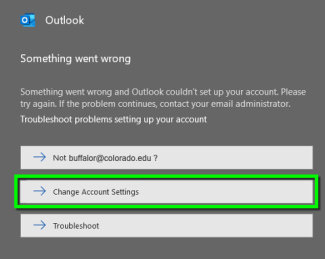
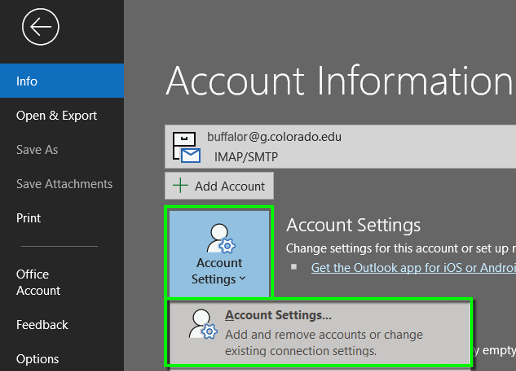